Samsung Galaxy Devices (One UI 7+)
Missing Your Unified Notification Shade?
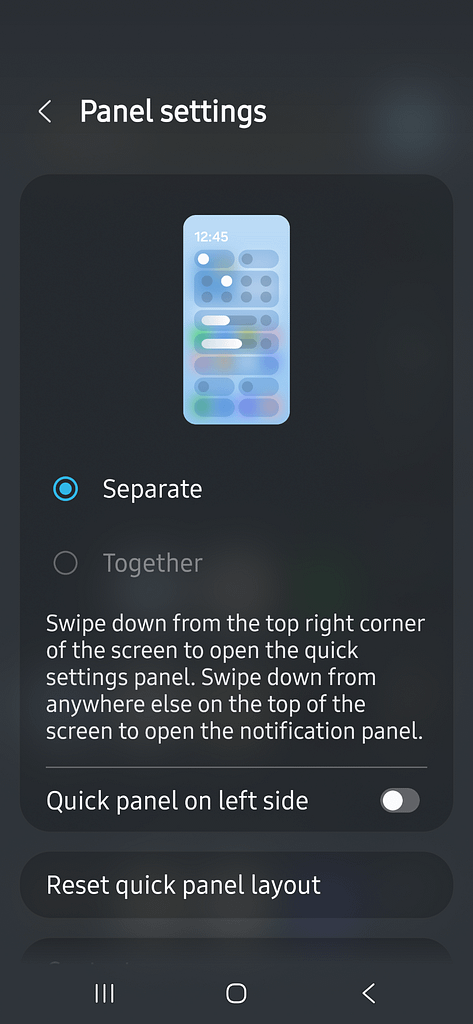
If your dropdown panel is suddenly split into two separate screens (notifications on one side, control tiles on the other), you can quickly restore the classic single-swipe layout.
- Swipe down from the top right of your screen to open the Quick Settings panel.
- Tap the Pencil (Edit) icon at the top.
- Select Panel Layout.
- Tap Together to merge your panels back into a unified view.
Fixing Missing Background Synchronizations
If you notice that real-time tracking or persistent notifications freeze or disappear, One UI’s background monitoring is likely putting the app to sleep.
Step 1: Exempt the App from Sleeping Lists
- Go to Settings > Battery.
- Ensure the app is not listed under Deep sleeping apps or Never auto-stopping apps. If it is, remove it.
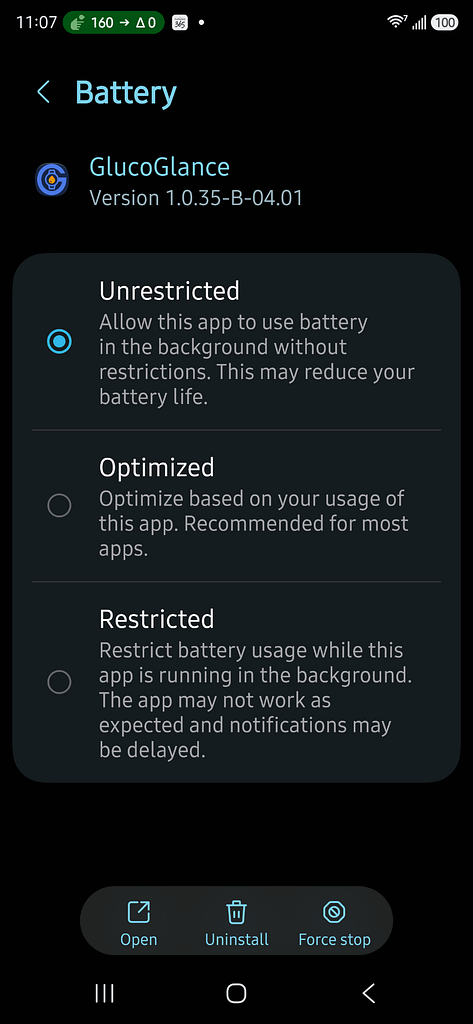
Step 2: Set Battery to Unrestricted
- Go to Settings > Apps > GlucoGlance > Battery.
- Change the setting from Optimized to Unrestricted.
Note: During onboarding this should have been selected
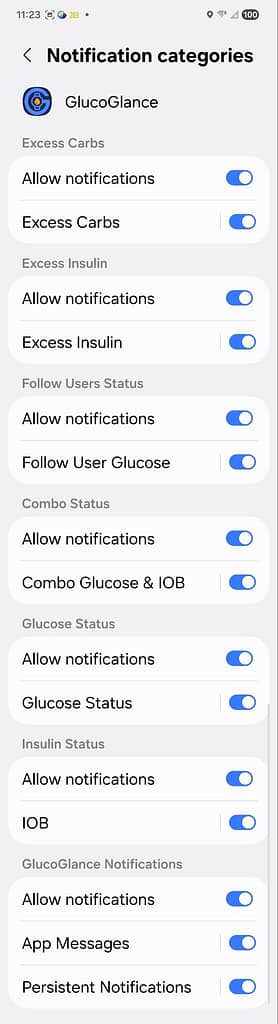
Unhiding Individual Notification Categories
By default, recent One UI updates hide granular channel toggles. If you cannot find the individual switches to adjust specific types of notifications for the app, you must reveal them globally first.
- Navigate to Settings > Notifications > Advanced Settings.
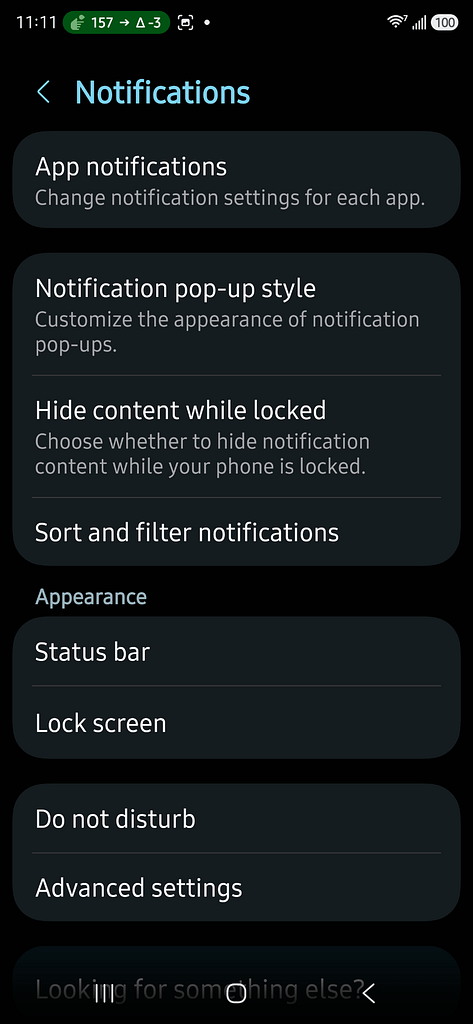
- Scroll to the bottom and toggle Manage Notification Categories for Each App to On.
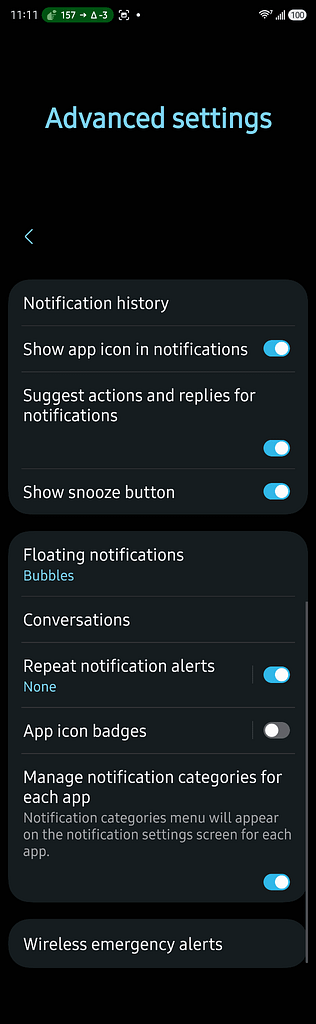
- Return to Settings > Apps > GlucoGlance > Notifications. You will now see the hidden Notification Categories menu to customize individual behaviors.
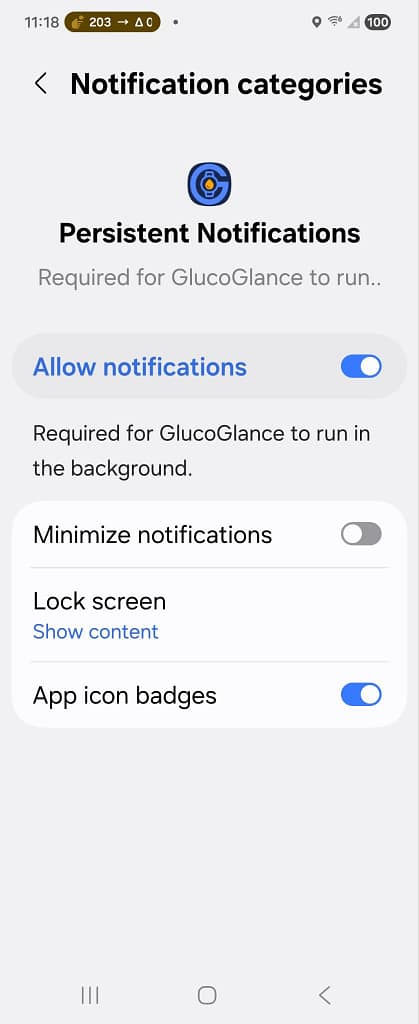
Crucial: Do NOT Turn On “Minimize Notifications”
For GlucoGlance to display real-time data properly in your status bar and dropdown shade, the Minimize notifications toggle in your system settings must remain turned OFF (as shown in the image below).
GlucoGlance actively passes critical, real-time physiological metrics—including your current Glucose level, Combination data (IOB/COB), or Follower updates—directly into this persistent notification window based on your in-app preferences. Turning on “Minimize notifications” forces the system to collapse this window, silencing any audible or physical updates and hiding your live streaming data summary from view. To ensure you never miss a critical shift in your values, verify that Allow notifications is active and Minimize notifications is explicitly disabled.
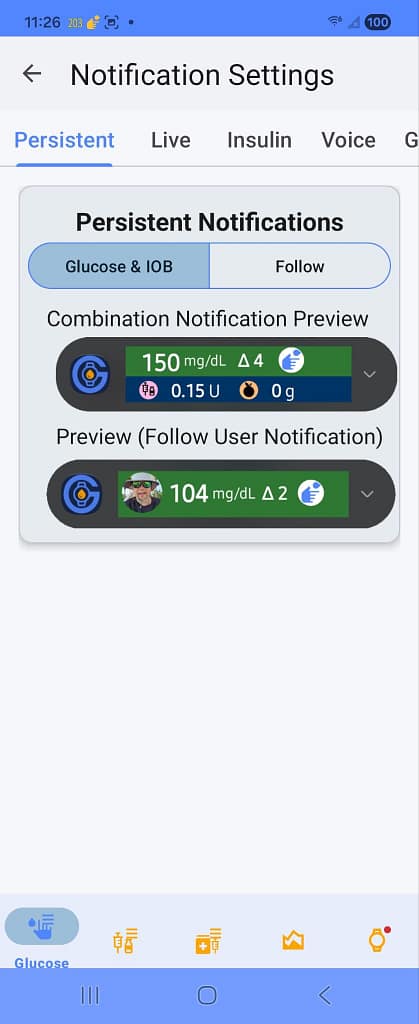
Choosing Your Notification Style
Within the Notification Settings > Persistent tab of the app, you have total control over how your information displays. Depending on your data sources, you can choose between three distinct layouts:
- Glucose: If you only have a CGM or Companion app installed, the notification uses the current real-time glucose number and color rotated trend icon (CRTI).
- Combination: If you use an Omnipod 5 or an Insulin Manager (Gluroo), the notification shows your current reading with tracking details, dynamically pulling in IOB (Insulin on Board) and COB (Carbs on Board) values.
- Follow: Dedicated layout for caregivers or family members, displaying live reading updates, trend data, and the profile photo of the user you are actively monitoring.
Viewing Full Notification Details on Your Lock Screen
Out of the box, Samsung collapses lock screen items into small, non-descript icons. To see actual metrics or status text without unlocking your phone:
- Open Settings > Lock Screen & AOD.
- Tap on Notifications.
- Change the view style from Icons Only to Details.
Staying Visible in the Samsung “Now Bar” & Live Notifications
In One UI 7+, Samsung introduces a new pill-shaped Now Bar dynamic element at the top of your status bar and lock screen (similar to an iPhone’s Dynamic Island). For continuous data streams, the system maps real-time updates directly through the Android OS Media Player controller to ensure your tracking stays front and center.
If you turn off media controls or disable Live Notifications globally, the system will completely hide the active tracker from your single-swipe notification list and lock screen.
Step-by-Step: Keeping the Media Player Active
To ensure your real-time values update smoothly without the OS suppressing the player:
- Open Settings > Lock Screen & AOD.
- Tap on the Now Bar menu item.
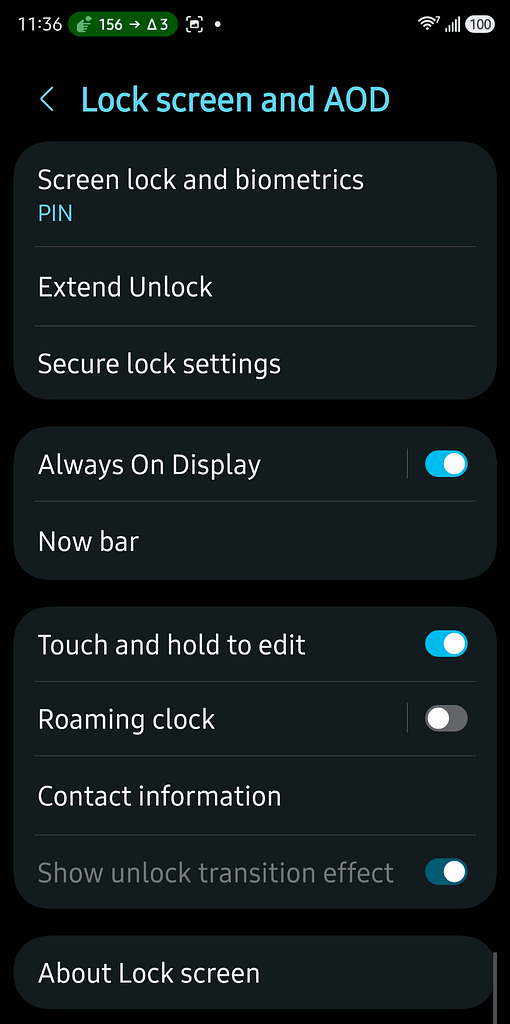
- Under the Live Notifications list, verify that the Media Player toggle is switched ON.
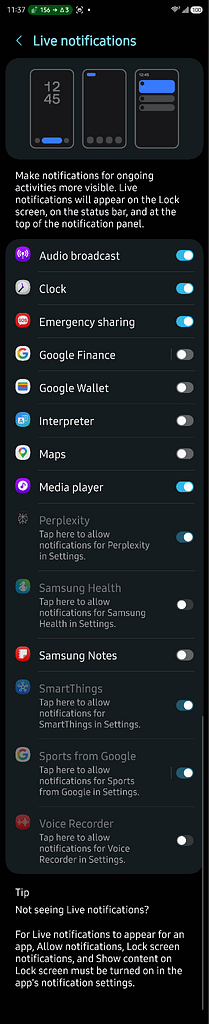
⚠️ Important: If you disable the Media Player here, One UI 7+ defaults to burying background activities inside the fully expanded Quick Settings panel (requiring a two-finger double swipe down), making it impossible to check your values with a quick glance at your screen.
Utilizing the Samsung “Live” Tab (Now Bar & Media Player)
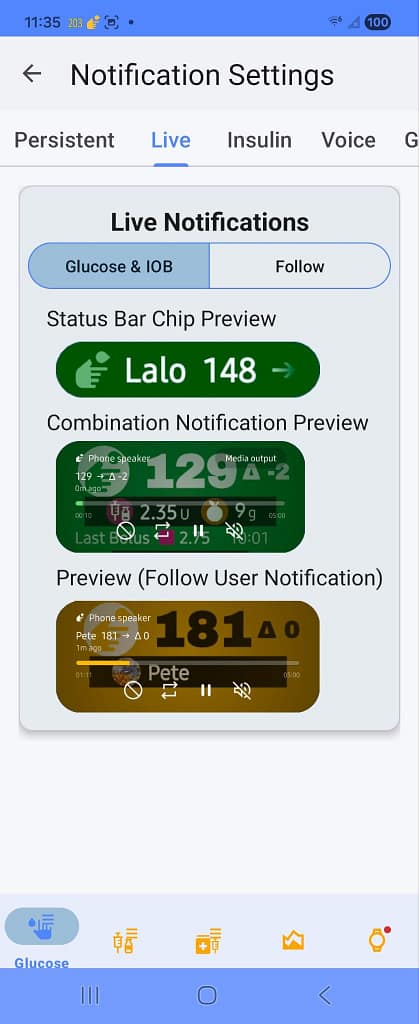
On the Live tab of the GlucoGlance Notification Settings, you can configure how real-time streaming data pushes directly into Samsung’s system-level media architecture. In One UI 7+, Samsung handles continuous, active data streams dynamically through its Now Bar interface (the pill-shaped dynamic element in your status bar and lock screen) and its native lock screen Media Player.
Much like the persistent notification setup, you can customize who you are actively tracking within this media layout:
- Glucose & IOB: Configures the system media player layout to focus entirely on the phone owner’s personal metrics, seamlessly rendering a Status Bar Chip (e.g., Lalo 148 →) at the very top of your display, alongside a fully expanded rich tracking container.
- Follow: Switches the active media feed to target an external user you are monitoring, instantly pulling their specific values and trend direction into both the status bar chip and lock screen widgets.
How the Data Displays: Status Bar Chips vs. Expanded Lock Screen Player
Samsung splits this streaming tracking into two distinct visual states depending on whether your phone is locked or currently in use:
1. The Status Bar Chip (Run-Time Visibility)
When using your phone, your active selection loads directly into the top left corner of your screen as a high-contrast pill-shaped chip. This miniature status pill remains locked in place so you can read your exact tracking name, live numerical value, and directional shift arrow out of the corner of your eye while using any other application on your device.

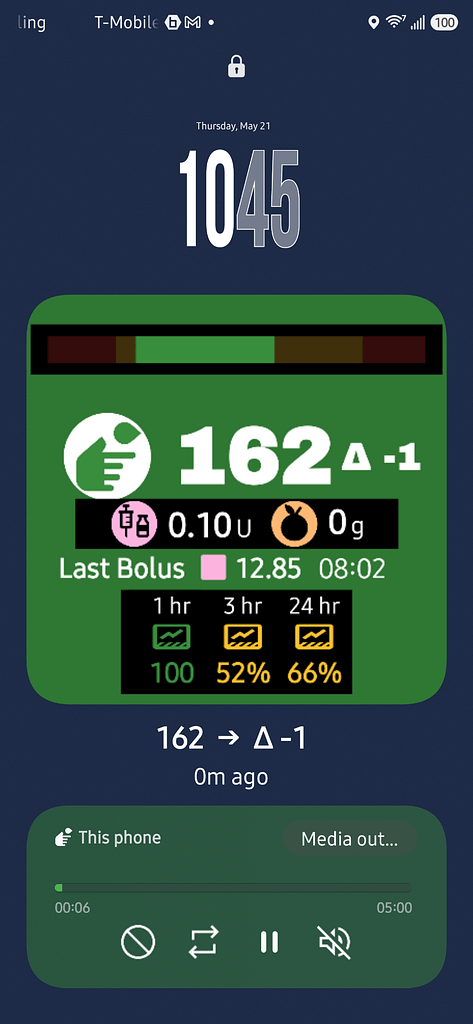
2. The Fully Expanded Lock Screen Notification
When your device is locked, tapping the small status pill or checking your active glance screen expands into a beautiful, full-width native Media Player layout. This design maps your glucose trajectory timeline, current reading, active on board units, and delta history directly into the system’s high-priority audio container—ensuring your vital metrics stay persistently anchored on your lock screen without being pushed aside or buried by regular incoming text messages or generic application alerts.
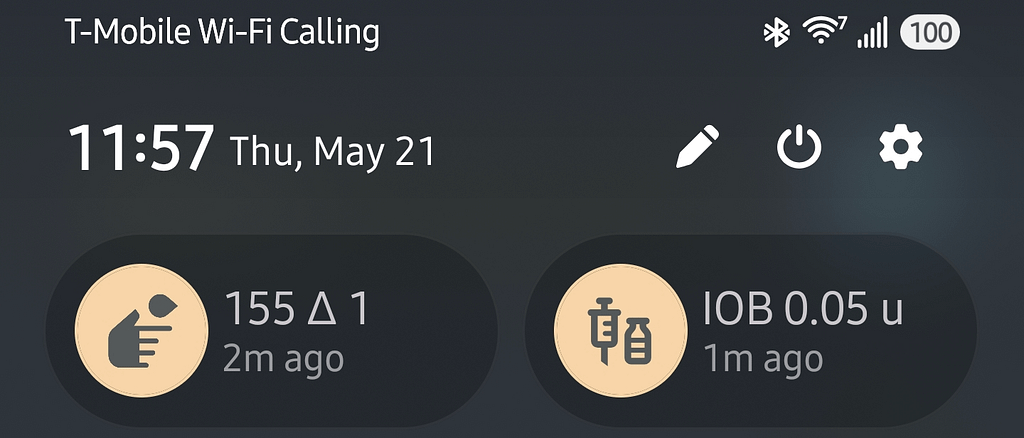
Understanding Your Notification Shade Layout
When you swipe down to check GlucoGlance alongside your diabetes management hardware, your notification shade organizes your data into high-priority visual zones. Here is exactly what you are seeing in the layout below:

1. The Media Player Section (“Live Notifications”)
At the very top of your shade sits the high-priority Live Notification container, driven by the Android system media player architecture.
- Who it is for: The primary phone owner.
- What it shows: This rich, expanded card outputs the primary user’s active streaming metrics (e.g., 145 → \Delta -3), visual trend timelines, active insulin units, and carb data. Because it uses the OS media track layout, it remains pinned at the peak of your dropdown panel for immediate visibility.
2. The Standard Notification Section (“Persistent Notifications”)
Directly beneath the media player are your standard, standalone application cards.
- Who it is for: Your actively monitored Follow User (e.g., a child or family member).
- What it shows: GlucoGlance uses this distinct area to separate external tracking data from your own. It displays the monitored profile picture, current reading, and status arrow (e.g., 105 mg/dL —) so you can instantly differentiate your personal metrics from the person you are caring for.
3. Manufacturer Hardware Notifications
The bottom layer contains the native, ongoing status notifications from your physical hardware applications (such as your CGM system or insulin pump control app).
- Why they are there: These system cards are generated directly by the hardware manufacturers to maintain the Bluetooth background connection to your sensor or pump. GlucoGlance reads data downstream from these sources to build the rich, unified summaries shown in the top two sections.
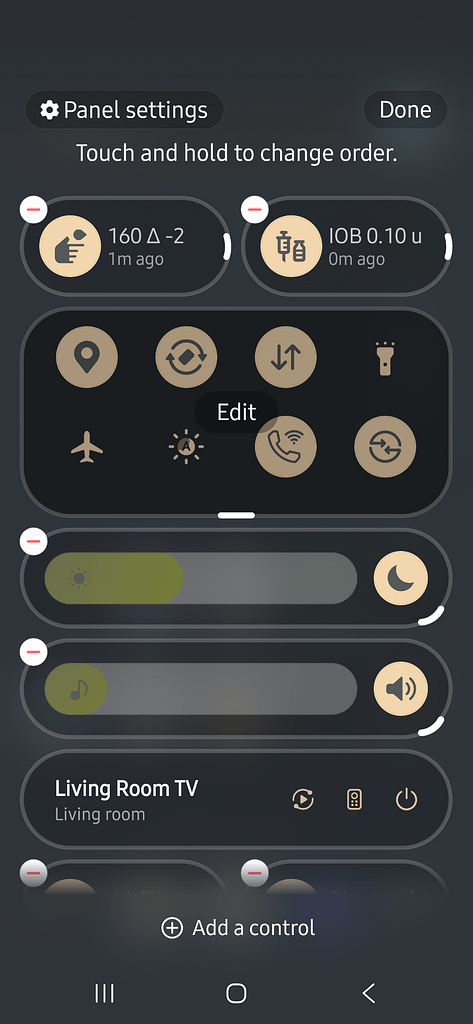
Activating & Customizing GlucoGlance Tiles in the One UI 8.5 Control Panel
Samsung’s One UI 8.5 completely redesigns the Quick Settings Control Panel into a modular, highly flexible layout. Instead of simple circular toggles, system controls can now be added as rich, wide-format tiles that display data updates at a glance.
GlucoGlance includes dedicated controls for Glucose readings and Insulin on Board (IOB) that you can pin directly to this main control grid.
Step-by-Step: Adding the GlucoGlance Tiles
- Swipe down from the top right corner of your screen to fully open the separated One UI 8.5 Control Panel.
- Tap the Pencil (Edit) icon located near the top right, next to the power button.
- Scroll all the way to the bottom of the editing screen and tap the large [+] Add a control button.
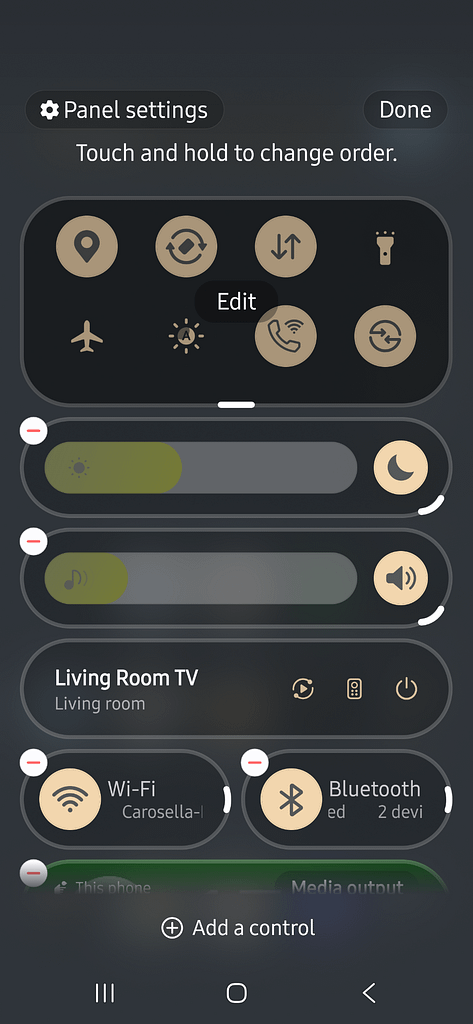
- In the control selection list, look at the top section or scroll down until you locate the GlucoGlance header.
- Tap the GlucoGlance category to expand it, revealing your available tile options: Glucose and Insulin on Board.

- Select the control you want, then drag and position it exactly where you want it to sit within your active panel grid.
- Tap Done in the top right corner to lock your new layout in place.
Grid Flexibility
Once placed, these modular tiles sit directly alongside your system sliders (like brightness or volume) or media elements. This gives you a high-contrast, glanceable reading target every time you pull down the control shade, completely eliminating the need to search for or launch the full application during daily activities.
Google Pixel Devices (Android 15 / 16)
Switching Between “Separate” and “Classic” Layouts
Android 16 introduces an optional dual-panel design that splits the notification screen from the Quick Settings tiles. If you prefer the unified drop-down layout, you can change it back instantly.
- Open Settings > Notifications & Quick Settings.
- Under the panel layout options, select Combined (classic) instead of Separate.
- Note: If you keep the Separate layout active, swiping down from the top-left handles your notifications, while swiping from the top-right handles your quick settings.
Keeping Background Services Running Smoothly
Stock Android aggressively optimizes power usage, which can suppress persistent status bar metrics or delay synchronization intervals.
- Long-press the app icon and tap the App Info (i) icon.
- Tap App Battery Usage.
- Select Unrestricted to prevent the system from pausing background processes.
Understanding the New Smart Lock Screen Layout
On Pixel devices running modern Android 16 builds, lock screen notifications prioritize unread activity.
- New/Unread items display as full-width text banners so you can read information at a glance.
- Previously seen items automatically collapse into small icons at the bottom of the screen to save space.
To ensure background updates are fully readable here, make sure Settings > Notifications > Notifications on Lock Screen is set to Show conversations, default, and silent.
Managing System-Level Notification Cooldown
If you notice the phone suddenly goes quiet during a rapid succession of updates, the system’s automated flood protection is active.
- If you want every single update to make a sound or vibrate immediately without the OS throttling them, go to Settings > Notifications > Notification Cooldown and turn the feature off.
| Scenario | What to Capture (Samsung) | What to Capture (Pixel) |
| Enabling Channels | The Manage Notification Categories toggle under Advanced Settings (which is hidden by default). | The default Notification Channels list showing the specific channel toggle. |
| Battery Freedom | The Unrestricted radio button under the App Info > Battery page. | The Unrestricted setting under App Battery Usage. |
| Lock Screen Data | The specific Details radio button under Lock Screen settings. | The Show sensitive content toggle. |